Sunday, April 24, 2011

And now, for something completely different.

In lieu of fixing things, disassembling stuff or making racket and a mess near the work bench I've been re-familiarizing myself with the Akai MPC 2000xl. This machine was the backbone of essentially all of my audio work from 2000 through 2004 and was rotated into the neglect pile sometime in the window of 2005 due to an interest in less constructed work.

While constructivist (not to be confused with the art movement) leanings return, musical taste and direction has drifted a bit since then. So while a lot of the sounds I had created remain useful, others (primarily in the brass/upper register department) suffer from being overused to my ears or to pulling up short in the quality department. Fresh cymbal sounds became a priority.


In the moving music store clean-up a year ago I went through the large pile of used brass that was deemed unsaleable for one reason or other, hand picking a smaller stack of cymbals that exhibited sonic characteristics that were interesting or useful. The main justification for sorting, hauling and retaining a pile of broken cymbals being sampling them into digital drumsets, which is exactly what has begun.


"Appropriate microphone technique involves doing whatever needs to be done in order to place the microphone in the perfect position as dictated by the needs of the recording. Compromise is not acceptable."

I captioned that picture (out of context) elsewhere, but, having a bit of freedom with mic placement can indeed produce favorable results. Without the concerns of a heavy handed drummer wrecking microphones, one can explore the stupid sort of placements that deliver subsonic response from what is commonly considered a high frequency instrument.


So, in the early hours before others have risen I may be turning off all fan bearing devices and hitting cymbals as the sun creeps up from the east.

Friday, April 08, 2011

I'm sort of stuck between a rock and a hard place in regards to this blog. Clearly I haven't been making any forward progress of late, though, since I've sort of fixated on this chronicle as a motivating factor in churning through the piles of shit that needs fixing it remains something of a priority. On the other hand, I find the diminishing momentum bothersome to the point of wanting to post for posting sake, which brings into light aspects of topic and quality control (which can indeed turn into a huge grey area while waking up to a cup of coffee). Anyhow, I digress. I'm still in a holding pattern, the makeshift work area is wrecked and I've decided to not post a picture of it. I'd hate to rob the imagination of this point of speculation.

I have however done some wiring loom work on the Autogram console, cueing things up for a bit of recording. This involved use of some 24 ga four conductor plus shield wire and crimped connections, the crimp connectors are designed for a larger wire so my process just barely squeaks by my established quality control to merit inclusion here.


Tool set is pretty simple, a less than pristine (car toolbox ripened) Channellock 909 crimping tool and red insulation connectors.


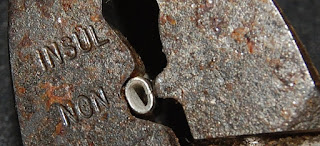
I start with the connector situated such, sans wire as this a prep step.


Gentle pressure to the point of distortion, the goal here is not to let the eye hole collapse as it still needs to receive wire. The connector is crushed to the point at which relaxing pressure on the tool will allow the crimp connector to be removed easily from the plastic insulation jacket.


The wire is stripped to roughly the length of the crimp housing. I try and strip it a bit shy as the finished result will look neater.


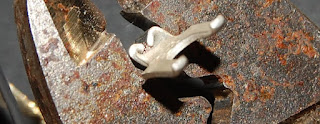
Gently positioning the connector in the jaws with the nipple at the seam, wire is threaded centrally..


..and the first stage crimp is executed with a nominally firm squeeze.


Please overlook my poor placement of depth of field in the photograph. This used to be the stopping point for me, though I would position wire to one side as the gap caused by the seam isn't the most structurally sound point to lay wires.


The connector is then returned to the "insulated" slot in the jaws and truly crushed.


Done.


These are XLR feed balanced inputs, I connected the shield separately to the body of the connector and doubled it up with the ground feed on the chassis connection at the mixer. Probably needless complexity, but I figured it may come in handy in event of ground loop troubleshooting should the need ever arise.