Friday, December 13, 2013

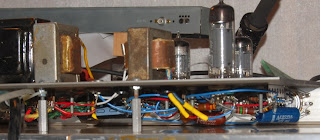
Above my racks in the studio I have some old light bar lamps that have the sockets wired up in series. This is to achieve two aims: a nice mild illumination that allows me to see while not being bright and extended useful service life of the incandescent bulbs.

At least, extended (my intent was indefinite) life span was part of the idea. Turns out having a bunch of bulbs overhanging the rack provides temptation to hang cables. Mind you, light bulbs are not load bearing. This one remained illuminated for about 10 seconds after the glass fell away. I was about to grab the camera when it flared out into what you see here.

No more using conveniently placed lightbulbs as cable hangers for me! Happy Friday.

In other news, I'll be gigging the reverb unit tomorrow, so I expect I should have some "I'm finished!" content soon.

Monday, December 09, 2013

Our temperate region was hit with an abnormally cold storm, derailing my plan to drive across town and use appropriate power tools to fabricate an enclosure for the reverb amplifier. I was actually toying with the idea to clamp a temporary table to my radial arm saw project (future instalment) when I came across an old Bach trumpet case I had salvaged from a pile of enclosures that were slated for a stop in a dumpster.

According to the reverb pan, this case will work out just fine.

Gutting it was not nuisance free.

The glued in monkey fur (remaining after I peeled the fabric backing away, which was a chore in itself) gave me ample opportunity to oil up my language.

Ultimately, once the fire hazard levels of fluff were removed the case continued to show promise. The area to the right where the shim block is will be filled with the B+ transformer I'm adding to the party.

Before I get that far, however, I want to address the incorrect capacitor I noticed the last time I posted, because the additional transformer is too large to mount to the chassis and performing work with a tethered chunk of iron is going to push the nuisance aspect a bit. Here I've pulled the 0.01 Black Cat and have eased a 0.1 Aerovox Duranite into the slot.

Access to the leg of the potentiometer necessitated the temporary displacement of the Domino cap, here everything is in position and ready for soldering.

Once the potentiometer assembly was buttoned back up it was time to address connection to plate leg of the tube socket, however, the longer package in the 0.1 cap put the B+ a little too close to the grounded screw for my comfort.

Tasteful application of brute force corrected the interference fit.

Nice round bend taking up the slack.

With the chassis sorted it was time to address the previously discovered deficiency in the higher voltage secondary of my installed transformer. I had toyed with the idea of putting a step up transformer across the 50 volt CT winding, but tests indicated that it was overburdening the 50 volt winding, so that plan was scuttled and this transformer was brought in, which provides roughly 200 volts DC once rectified, which is plenty for me.

I got to fill in the empty eyelet with a ground reference due to no center tap on the transformer.

With my car still snowed in (we reached -10F/-23C and the old moisture bearing door seals quite literally have frozen this car into a solid shell, though I am certain the aircooled motor would fire right up - if only I could get inside to operate the car) I decide to hand carve the enclosure.

Naturally, the larger knife I would normally reach for in this instance is currently TRAPPED INSIDE MY CAR, so I had a go with an old box knife...

...which resulted in many shavings.

I think in the end it will all be worth it though.

Saturday, December 07, 2013

200th post! Let me take a moment to explain my extended leave. The notion that I was starting a bunch of threads then leaving them out to wither and fade away was weighing down on me a bit. See, as I would climb the archives for a kernel of data (these posts are probably more for my own benefit than anyone else's, though I do appreciate the support and positive feedback when it comes up) it became more and more apparent that the greater majority of my posts were either showcasing an object (not my intent) or lacked closure.

In short, it really seems a scatterbrained collection of halfway theres, and I made the command decision to NOT "pollute" these logs with more half finished business until something started was ushered to completion. That something is the outboard reverb build I have been dancing around for more years than I care to contemplate. So this blogging process was shelved while I did other things, make no mistake, I haven't wandered away from flowing solder - I just couldn't bring myself to post about anything other than the reverb, until it's done.

Yes, it really has taken me months to move on beyond chassis layout and punching holes (arguably more involved) to actual circuit wiring (you know, the FUN stuff). Ask me about painting my car next.

No, don't.

At any rate, progress has been made so here I am. For those that don't already know, the Fender 6G15 reverberation amplifier is loosely based on the Fender Champ - driving a spring reverb tank in lieu of a speaker, with an additional gain recovery/dry mix stage on the output. For reasons I have quite simply forgotten at this point, I decided I wanted to oust the 6K6/6V6 Champ inspired power section with a 6BQ5/EL84 single ended section. So, since I have one underfoot that I can observe directly, I turned to the Kalamazoo Model 1.

However, while the Champ and Model 1 are of similar class, they are of different pedigree. There were strengths I wanted to combine, and so we launched into hybrid territory.

Make no mistake though, when it came down to actual assembly I did not consult the gods of audio. I grabbed whatever I had on hand, you know, like the Old Masters did. Pictured above is the initial 12AX7 tube, first stage at high numbers (socket pinout) feeding a preamp gain (dwell) ala 6G15. This returns to the low numbers triode which is wired up more like the Model 1 sans tone control feeding the power section.

Here it is evident that I am using previously built components, and did not exert a lot of care in cleaning the vestiges of whatever this used to be. It's a 6BQ5 single ended power section now, please ignore any other disarray. AT LEAST I DIDN'T LEAVE REMNANTS OF WIRING!

I'd like to note that while the power amplifier stage is pretty much lifted directly from the Kalamazoo, the B+ power supply feeding it is a choked configuration more in line with the 6G15. The single ended amplifier stage feeds an output transformer coupled to a spring reverb tank.

The return from the reverb tank is seen here, direct coupled to the low numbers side of the 12AX7 gain recovery tube. This feeds a tone control connected to the high side of a mix control to output. High number side is a cathode follower dry feed taken from input jack, which drives the low side of the mix control.

Depicted above is the aforementioned tone and mix controls. Allow me to name off the imbroglio of capacitors, as there is no single photographic vantage point that could make sense of this mess.

The burnt sienna .03@600 CDE to the left is the DC blocking input cap for dry stage. Grid is elevated ~ 100 volts or so, and this fine capacitor is what keeps that off my pickups (or transistors, opamps, transformers, whatever.. outboard spring reverb will see more duty than just guitar).
The cyan/turquoise .1@400 is the DC blocker at dry cathode follower to mix pot (at right).
The .01@400 Sprague Black Cat is my reverb recovery section coupling cap to tone control. I think this should actually be a .1, that's a mistake (see if you can spot two more amidst these pics!) but I guess I'll leave it be unless reverb return sounds too thin.
The black .01 disc cap is the tone cap from control to ground, doing what it can to shunt ALL my signal away since I botched the coupling size.
The domino mica cap is a 500pf coupler from tone wiper to mix. I figured I would double the 6G15 design of 250pf here, because, well, you know, I like a little bass. Hahaha, apparently this was a wasted effort. I'll revisit this later. We're not done yet.

Before anyone pipes up about it, yes, I am aware of capacitive coupling, lead dress and ground loops. Thankfully I'm okay at (read as: used to) working in tight configurations, what with the rework I have in store.

The unit is going to be a controls on face, at bottom type of configuration (ala Marshall heads); so this is the natural finished stance of the chassis. Rear support is not going to be via standoff, it will be supported all sides by wooden runners.

So, with everything more or less squared away I set about the initial slow warm up on a variac. Something, however, was amiss. My voltages were way off, B+ being abnormally low. Concern with a short circuit proved unwarranted. Everything tested out okay, it was just that my B+ leg was reading roughly 10% of expected.

I had tested this transformer prior, and it was concluded to be a ~500 volt center tapped secondary. You know, because I measured it. Having the luxury of an uninstalled identical transformer I conducted the measurement test again on a part out of circuit.

Imagine my surprise when it turned out the high voltage secondary of my chosen power transformer was in fact delivering only ~50 volts across the windings! DECIMAL POINTS MATTER.

Above is an example of finished fitment, tight gap between the tube and chassis. Too tight? I'd probably bevel that on a production unit, but this is not, so..

Anyway, I'm wary about trying to fit enough discrete voltage multiplier stages to make use of the 50 volt center tapped PT work, so I'm thinking about piggybacking another transformer in there, either something with a proper B+ right out of the gate, or a step up I can drive with the 50 volts (I think a 120:24 volt transformer may work nicely here). Sadly, I couldn't find a correct voltage range with identical mounting in my piles, so the fix may wind up being less than visually perfect.

Of course, it'll all be encased in a cabinet anyway. Stay humble!

Friday, September 13, 2013

Happy Friday!

I know, I know.. elongated lull. Apologies. Expect more of the same...

..for now.

Sunday, June 16, 2013

After breaking the old Japanese chassis punch set I've had for ten some odd years, I figured I'd have a stab at cheaping out with Harbor Freight to see if I can find something serviceable. Took a gamble with a 91201 ten piece punch set. Something to keep in mind about this set, it is designed around outside diameter of conduit. Allow me to demonstrate:

0.5 inch.

0.75 inch.

1 inch.

1.25 inch.

Working into space constraints, I really need a 1 inch hole, going over by 84 mils will put me into breaking sidewall territory, so I grabbed the 0.8835 "1/2" incher with the intent of making up the difference with file by hand. To its credit, it did seem to make a bit more progress before failure.

There are a lot of ways to botch a screw, and I've sheared my share of hardware via the mechanical force of the hardware itself; I do not recall seeing something quite this bad.

A little internet sleuthing (admittedly done BEFORE I purchased the tool, so you're all encouraged to laugh heartily AT me) indicates a lot of failure with the small stud, but apparently there's a newer revision that addresses the problem. Hopefully mine is first rev, this level of failure indicates process issue with me.

If you're bored and want to read more about this sort of thing, look up "cast iron railroad bridges".

Brittle metal.

I've given the stud a bit of scrutiny, and cannot find evidence of material having fractured out of the screw. Thread count matches, and I can see where faces would line up. However, the metal is now highly deformed and the gap will not close when lined up, as if it was under heavy preload prior to failure and relaxed into a state that puts a wide void where thread should be.

It's almost as if it's laughing at me.

The panel is getting nicely chewed up at this point.

Side by side, a comparison of losers. Really though, it's pull stud failure on both accounts, so instead of fussing about with further stupidity I'm thinking of visiting my local reputable hardware supplier and seeing what I can get in the way of threaded stock that can support this sort of load.

In the mean time, for this one, I just drilled it out as high as I can go with a drill (0.875") and made the rest up with a hand file, as evidenced by the bought of scraping situated inboard of the abnormally large pilot lamp assembly.

Now that the front panel can support a mock up, I'm free to position the iron for plunging the mounting holes and then moving on to tube socket & various. Thankfully, I'm substituting a 6BQ5 for the 6K6, and I can get away with making a hole to accept 9 pin miniature with the drill press. Otherwise, I'd probably be a bit irate about this experience.

Also, FWIW, my snap edge is the one pictured on the left, the uglier cut to right being one conducted in field with a circular saw (by others). Thought it crucial to defend my work since that will all be buried in woodwork anyway. HAH

Saturday, June 15, 2013

Set about building a loose Fender 6G15 clone today. Then I got the wise idea of deploying an oversize pilot lamp assembly on the front panel.

Sometimes good ideas end in tears.

Clearly there wasn't a whole lot of steel connecting the threaded draw stud and the die assembly, I was having a hell of a time pushing the punch through (bending metal was involved). Apparently 8 gauge alumin(i)um is beyond the capacity of this instrument. The instrument in question being a "vintage" (it has a wooden box, no idea on era of manufacture) multi punch set of Japanese manufacture.

I also felt a little elation at rediscovering the root of the word "borked", typographical error in my naming of the file "broken-punch". Sure, this may be in error, but I'm going to demand you allow me this silver lining and refrain from dashing my bit of feel good until you see a pic of the finished panel, thanks!

So close. I figured I was at about the initial shearing point where actual force involved drops dramatically, which was good, as this was proving to be a PITA to punch by hand. Then the force required to turn the screw dropped like a rock.

Well, I've got an idea of where the hole *should* be.

Pretty sure this won't accept the 1 inch lamp body though.

In other news, the scroll saw handles 1/8th inch 6061 (I think) just fine with a 10 tpi (Delta 40-193) regular tooth blade. I went super easy on the feed rate, and ran into no problems. I'll be having a go at using the chop saw as soon as I find a sacrificial 10 inch blade (not my fine finish framing blade).

I did flinch a little at running completely through, but scored as such and with a quick swipe of hacksaw (before deciding to give the brute force method a go) the material snapped pretty well. This is where the metallurgists may pile in and inform me the 6061 is wrong. The extrusion is surplus from seismic joint assemblies, it's either 6063 T5, T6 or T52; 6061 T5, T6 or T51; 6105 T5 or T6, 6005 T5, 6005A T5 or T61, according to current manufacturer datasheets. Anyway, I've got plenty for now, it's nice and thick, and will be turned into stuff that is not part of a building.

In the end, I think this oversized pilot lamp will be worth the effort and headache. In the meantime, in looking at the going rate of Greenlee punches (taking into account the variety of sizes I need) I'm thinking the path of least resistance is to fix my welder, fix this punch and tough it out until I finally get around to completing the CNC build (Couple years? Sooner? Later? Time will tell, taking bets now... ).

Monday, June 03, 2013

It's high time I commence working on enclosures. To assist in this endeavour is a new to me Craftsman 103-23100 benchtop drill press that evidently hasn't seen much use in a while. This is replacing a Harbor Freight special that essentially boiled down to a nightmare of radial slop. I could plunge a neater line by hand, but I digress.

I'd much rather talk about stylized mid century domestic US steel than the resulting product of decades worth of exponential bean counting. Make no mistake, it may be manufactured in China, but those cheap tools are American products. Apologies, that's just my Monday morning cheer shining through.

The prerequisite visual inspection indicates a little work is in order. While the angle of shot does not reveal it well, I can report that both legs of the early cloth covered AC mains wire have slipped their insulation at this point.

I think the motor is not original, the bolts however may be.

I'll make sure to evenly distribute those washers upon reassembly..

Removal of the AC access plate indicates some years of use as a wood working tool.

Not high tech, but the installation outlasted the wire itself.

There's a little black smudging on the soldered joint about an inch back from the stud, I'd like to know what's been going on here before putting the motor back into service.

The corresponding point in the wire...

...supports the theory that the insulation failure coupled with a conductive path of oily wood dust provided a high resistance path that could heat up with use. Or, perhaps it's just an oily spot. Either way, the motor is functional and intact. My elation at having an operational piece of equipment is evidenced by the fact that I clearly leaned forward a sixteenth of an inch while taking that photograph.

New wire snaked into place, now with a chassis ground.

While operational, I think I may have to dig into this one deeper, as the rotational assembly seems to exhibit more resistance than I would like, while the vertical travel is as lubricated as a ■■■■■■ ■■■■■ and will drop the drill via gravity feed unless I adjust tension to the point where I can no longer gauge the feel of the drill.